

How To Remove Wire Mesh Under Tile
When we say we're "tackling a room" it's usually a figure of speech communication, but in this case it's pretty close to existence a literal description of our big bathroom demolition weekend (cheque out this postal service for more info on why we're doing it and this post for our plan for the space). The biggest surprise from our weekend of knocking stuff out and gutting the room? Well, the bathroom sorta tackled back.
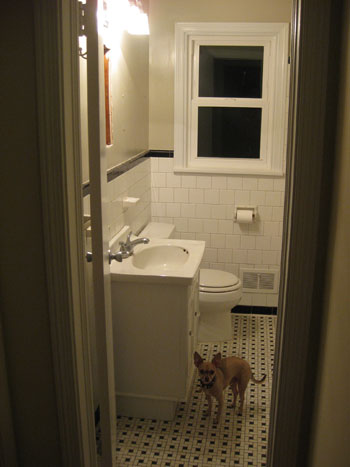
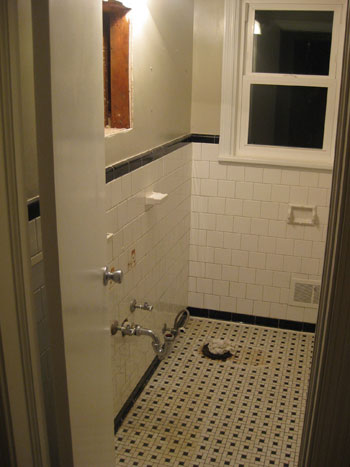
Before nosotros could be all "in with the new" we had to have care of that pesky "out with the one-time" part. Hither'due south what the bath looked like once we cleared all the simple stuff out (baskets, shower drape, mirror, rug, etc). Nosotros told Burger to say goodbye and he wasted no time…
Then Sherry helped me remove all of the fixtures (toilet, vanity, faucets, shelves, shower mantle) and it was up to me to demo out the tiled portion of the walls and the entire flooring (since Sherry's busy doing other important things these days). And demolishing wall and floor tile was actually something I'd never done before (neither had Sherry, and boy was she sad to miss out on the fun). But how hard could nifty stuff upwardly really be? Famous concluding words, correct? After some online research and chatting with friends and family, we readied ourselves with the necessary demolition supplies. They brutal into three categories:
- Tools for dismantling and generally busting stuff up (hammer, sledgehammer, small crowbar, screwdrivers, wrenches, razor, drywall saw, etc)
- Supplies for managing the mess (broom, dustpan, rags, buckets, trash cans, heavy duty contractor trash bags, painters record to embrace drains, a shop-vac, etc)
- Items to protect me and/or the firm (goggles, gloves, gas mask, old apparel, cardboard and a material tarp to lay over the tub, and a plastic drop textile to seal off the room).
Who knew knocking down a bunch of tiles took and then much prep? But in the end I was thankful for (and used) every terminal item. Here'due south the 3-24-hour interval fully detailed rundown.
****************************************************************
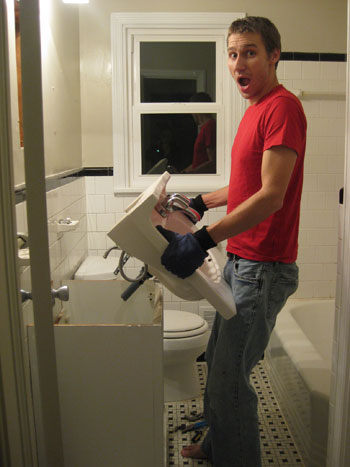
Day One: Subsequently shopping for all of this stuff final Friday evening, we returned home to do the bones – and cleanest – tasks starting time. We worked together to remove the old vanity past just turning off the water, disconnecting the plumbing with a wrench and unscrewing the vanity and sink from where it was attached (both to each other and to the wall). After that it simply took ane strong tug to lift the sink off and deport information technology out of the room (quickly followed by the base of operations of the vanity).
With that gone, we turned our attention to the toilet – which we actually plan to reinstall later on since we replaced it simply a few years agone when nosotros moved in. It was a similar procedure of turning off the water, then disconnecting the plumbing, the seat, the tank and the basin i-by-one.
And of course we plugged up the sewage opening with an erstwhile rag to prevent any nasty fumes from escaping (and to keep debris from entering afterward).
With those big items gone- followed past simply unscrewing the shower fixtures- the room was entirely articulate and information technology was time to get rested upwards for Saturday.
****************************************************************
Solar day Two: We woke up bright and early on thinking that Saturday would be the only demo day. I, the non-pregnant member of our household, was going to be a one-man wrecking ball while Sherry kept her distance from the mess and the grit (trust me, she wasn't sitting around eating bon-bons she was hovering and wishing she was the one with the sledgehammer). Just with our business firm being built during the era of lead pigment, we were EXTREMELY careful about keeping Sherry away from the demo zone AND keeping the demo zone away from Sherry simply in case there was any pb paint lurking behind the newer coats of latex (i.eastward. I didn't habiliment my dirty clothes outside of the room, we sealed off the doorway with a thick plastic driblet cloth, and whatsoever wayward dust or clay was immediately cleaned upwardly with a wet rag and TSP cleaning solution- which is recommended when dealing with potential lead-paint grit). And of course I was all decked out in my protective gear for added safety (goggles, gas mask, gloves, erstwhile apparel that we tending of later, etc).
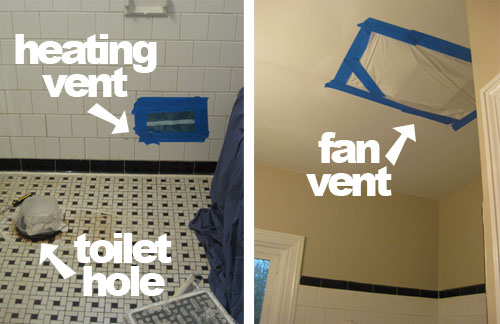
Oh and hither'south a tip whether you're dealing with atomic number 82 dust or but regular grit (which is as well nasty and volition permeate every cranny of your unabridged house if y'all let it). Information technology helps to seal up heating vents, bath ceiling fan vents and fifty-fifty to cover your "toilet hole" (aye, that's a technical term) to keep nasty debris from invading those alcoves (and potentially spewing all over the place once the oestrus/fan is turned on). Plus you don't want to clog up your sewer with fallen chunks of wall tile.
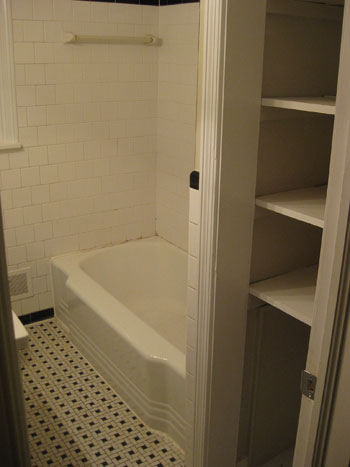
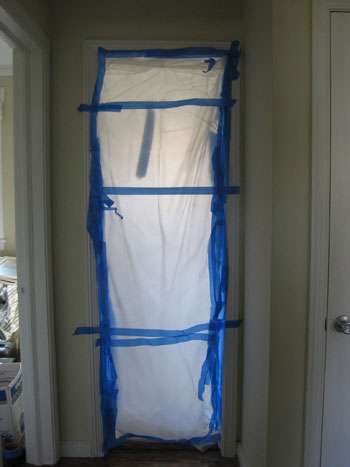
Speaking of sealing things off, here's a view of the heavy duty plastic tarp that Sherry stared at all 24-hour interval, constantly asking me what was going on considering she only heard banging, crashing, and probably a off-white corporeality of muttered profanity. It's just a heavy duty plastic drop material, but when taped in identify it's really an amazing fashion to go along everything nasty in the room… and out of the rest of your home.
But back to the view backside the bubble. As mentioned, I entered looking like a dislocated comic book character (the googles paired with the gas mask created sort of a pathetic villain vibe) and thanks to all my prep piece of work the night before, I rapidly began knocking off those wall tiles. I was implementing a simple crowbar-laid-at-a-tile-edge technique, followed by a few strikes of a brusk handled sledgehammer. Let's simply say it was slow going. Every bit in, it bankrupt loose a tile or two for every four or v swings of the hammer. Very rapidly, the sheer amount of work this would take me started to set in. Not to mention what I discovered behind the tile was Non modern backerboard or drywall (which I was hoping to saw out) but rather two inch thick physical mortar sandwiching a sail of thick mesh-like metal. It was an older tiling technique that I had read about online but somehow never realized could exist institute in our older abode. D'oh.
Only having committed myself (by way of heavily sealing myself into the room and already being quite dusty) I decided to plug away. After all, the "striking it as hard as I can technique" was working – only ever then slooooowly.
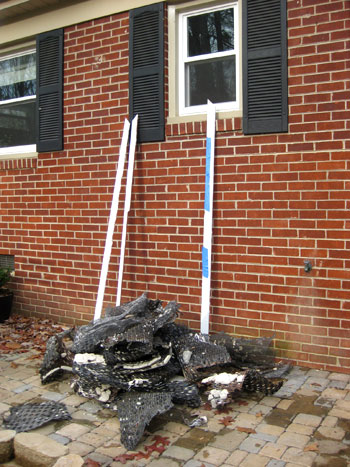
Fast frontward 6 sweaty hours later (not sexy-sweaty, gross exhausted-sweaty) and I'd finally managed to get all of the tile off the wall. Even with the floor tile left on my to-do list, at this signal I would have thrown my arms upwards victoriously… but I barely had enough energy to move them. Plus, the amount of tile rubble surrounding me made any fast movements a adventure to my balance. I never imagined how much trash our tiny bathroom would create (it could accept something to practise with the fact that someone decided to tile ALL THE WALLS) only I was very grateful that we invested in a large box of heavy duty contractor trash numberless. Note: don't fill the bags with more you can lift because I don't know anyone who can bear a trash bag full of rocks (even a weird gas-mask-and-goggle-wearing comic volume character).
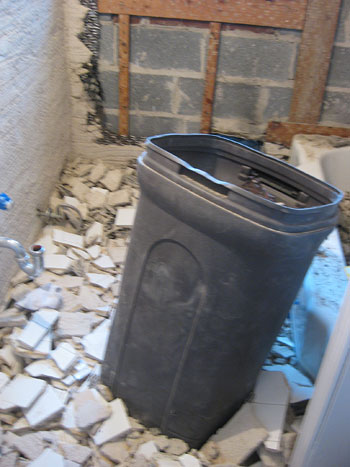
But before turning to make clean-upward, I decided to power through two more hours of work (basically every bit long every bit my float would final – oh the irony of spending the day in the bathroom but having nowhere to "go"). Sure all the wall tiles were down, but I now had to demo out the stuff backside them to go down to the studs (and cinder blocks, I presently discovered)- which mainly consisted of a few inches of serious mortar with that maniacal metal-mesh sheeting nailed to the studs backside it. With my supposed "one twenty-four hours" of demo apace looking like two (or iii?) I wanted to at to the lowest degree make a dent in all of the thick metal mesh and mortar that taunted me from every angle. This involved smacking it with a hammer to knock every bit much of the mortar off (and ofttimes using the back of the hammer to pry it). Then, once that nasty metal-mesh was mostly exposed, I used the back of the hammer to pry it off of the wall (it either pulled information technology off of the nails in the studs/furring strips or pulled the nails correct out along with it when I used plenty force). And that's when I discovered the cinder blocks (!) backside the window wall…

I got ii walls completely stripped down to the studs/furring strips before my arms (and bladder) virtually gave out and it was time to call it a night. And since the gym was closed (where I've been showering) and I was coated with debris, I had to rinse off all the dust I collected over my eight 60 minutes workday exterior with the hose in twoscore degree weather. Sherry did bring me some hot h2o with a washcloth and a bar of lather in the end, but I was even so standing barefoot on the patio freezing my sore bum off. Yeah, I don't desire to talk virtually it.
****************************************************************
Day Three: Dominicus kicked off early with sore muscles, cramped easily and the removal of all of Saturday'south trash by way of dozens of heavy-duty contractor'south trash bags (I left virtually ten inches of demo'd tile on the flooring the dark earlier, then getting information technology out to the garage was important since balance is key when property sharp objects like a crowbar). Oh and we started a pile of trash in our garage that we'll haul abroad in one case the project is 100% complete. We plan to rent a $19-an-hour pickup truck from Home Depot and pay most $viii to drop everything off at the local dump (which ends upward being much cheaper than renting a dumpster although it's a chip more than labor intensive since we'll be hauling stuff ourselves). Just carting out all that smashed up tile, mortar, and metallic sheeting took most an hour or and then, followed by some other 4 hours of metallic mesh removal and then another circular of make clean-up. Why clean up again? Because I had to clear the way for my next consignment: the flooring (so kickoff I had to find information technology once more). Here's that intense metal mesh I'k talking about that was behind all the tile and a few inches of heavy-duty mortar. Aye, information technology's not craven wire:
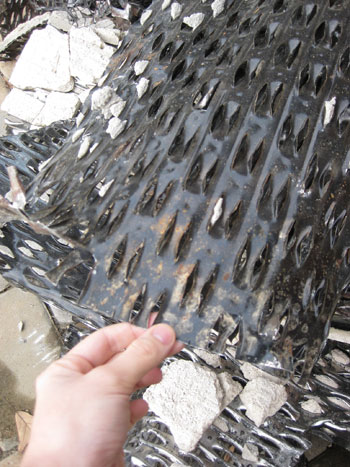
Seriously, our bathroom could have doubled as a bomb shelter.
Anyway, after having gone through all of this on the walls (and information technology being about 4pm on the day before I had to go back to work), I knew I could/had to do the floors more than efficiently. We had actually chipped away a section of flooring before starting demo work, then we were already aware that our worse-for-wear-basketweave tile was also ready in mortar atop metal mesh which rested on diagonally placed subfloor beams (the fact that the mortar and metal sheeting was also in all the walls of the bath was the added surprise). And so, thanks to some googling ahead of time, I already knew that a demolition hammer was my ticket to getting 'er done. And thank goodness hardware stores like True Value rent those suckers for about $sixty/twenty-four hours. Recollect they gave us a place on their DIY Blog Squad forth with a generous souvenir bill of fare? Information technology certainly came in handy, so from the bottom of my middle, cheers True Value, for saving me from what I tin can just guess would have been ten more hours of hard labor.

Merely back to my new favorite power tool. The demolition hammer is similar a mini-jackhammer and is by far the biggest powertool I'd always used (that'south not saying much for me, though). So I trepidatiously placed the chisel against a grout line on the flooring and pulled the trigger. With a few sharp pounds of force, upwardly came a section of tile (and the concrete beneath it). Victory! Now somewhat reinvigorated by my trusty devastation device (and feeling more like a cool superhero instead of a disheveled goggle-and-gas-mask-wearing weirdo) I was able to break up the entire floor in about 90 minutes. Kinda made me wish I had used it on the walls. Sigh.
Speaking of which, I have to admit that this whole demo take chances was a little bit of a roller-coaster ride for me. There were times when I felt like giving up because the task seemed insurmountable and there were times that my body just wasn't up to the challenge (after a few of the more challenging hours). Simply then at that place were other times – like as I pried upwardly the last of the metal mesh on the floor to expose the raw bones of our house – that I was excited by the amazing transformation I was bringing to our bathroom. I hateful, information technology's kinda awesome to stare at the basic construction of your house…
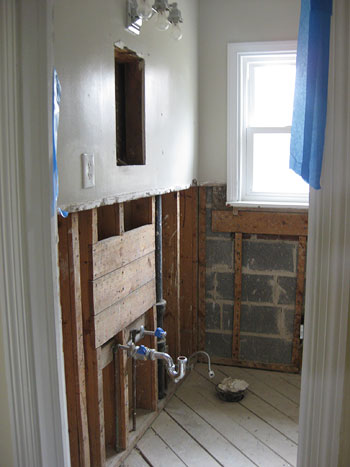
… fifty-fifty if it includes an area of rot next to the tub (more on how we remedied that in a after post).

And happily, my roller-coaster ride came to an end around 11pm on Sunday night. There's nothing like eking things out when it'south down to the wire. I had finally removed all the last bits of trash and rubble, dusted and shop-vac'd as much of the remaining dust and clay equally I could and fifty-fifty wiped down most surfaces and tools with a rag moistened with TSP cleaning solution (over again, trying to be sensitive to potential lead issues). Amazingly, the demo was complete – just in fourth dimension for me to get most seven blissful hours of shut-eye before dragging my weary body off to work the next morning. And yes, there was another cold outdoor shower, just this ane didn't seem half equally bad…
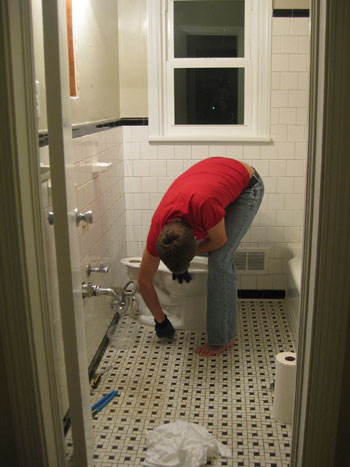
*At present for a little safe suggestion: habiliment proper closed toe shoes when taking on projects! We don't know what nosotros were thinking in those two barefoot photos but we definitely recommend keeping your anxiety protected, especially for those heavy duty tasks. Safety first!
Psst- Wanna check out Affiliate One of the big bathroom redo? Click here for those deets.
Source: https://www.younghouselove.com/tackling-the-bathroom-chapter-two/
0 Response to "How To Remove Wire Mesh Under Tile"
Post a Comment